
Upgrading Guide for MK II NS intercom
This Upgrade Guide aims to assist you in upgrading your intercom. We provide instructions on how to seamlessly transition your existing gate access intercom to the MK II NS version.
Click here to find out more about the 2G/3G Network Cut-offs
*Requirements checklist before upgrading
-
Switch Mode Power Supply and transformer are connected.
-
Original back-box with 4 mounting pillars.
-
Updated back-box with 8 mounting pillars (Upgrade kit).
-
Keypad and Display assembly version KPBL101-C or greater. Find out more about Keypad and Display assemblies.
-
An internet connection with a minimum upload and download speed of 10Mbps.
-
A CAT 5 cable between the intercom and the router, or a Wi-Fi router with an Ethernet port. (*Compatible routers: TP-link MR100, TP-Link MR200, TP-Link MR600, ZTE_R2192_LTE_MiFi_4G)
-
A VoIP contract (Comb can assit regarding your VoIP line).
- Inline Surge Protector (with POE Pass-through)
-
Backup power for the internet equipment to be provided by the complex.
-
An Earth point connection.
Lets us Begin!
1. Switch off the main power to the intercom before replacing the transformer and/or the PCB.

2. The transformer must be replaced with a switch mode power supply when converting to a MK II NS:
- 2.1. Remove the transformer and replace it with the switch mode power supply. The switch mode power supply is mounted on a plate that fits directly onto the existing transformer mounting pillars.
- 2.2. The main supply is taken from the lightning arrestor.
- 2.3. The output from the power supply connects to the intercom PCB. The Intercom input power supply has a bridge rectifier which ensures the correct polarity to the PCB.
3. The original back box is fitted with 4 mounting pillars which will not support the smaller MK II NS PCB:
- 3.1. The upgrade kit includes two self-adhesive stand-offs to support the new PCB.
- 3.2. Place the two stand-offs into the upper two holes in the PCB.
- 3.3. Remove the adhesive protection layer.
- 3.4 Align the PCB with the bottom two mounting pillars and fasten using two screws.
- 3.5. Firmly press the two stand-offs onto the back of the box.
- 3.6. Attach the speaker harness, microphone harness, ribbon cable, power supply, OBR, and relays to the PCB.
4. Fit the MK II NS PCB into the updated back box which now has four extra mounting pillars that align to the smaller MK II NS PCB board.
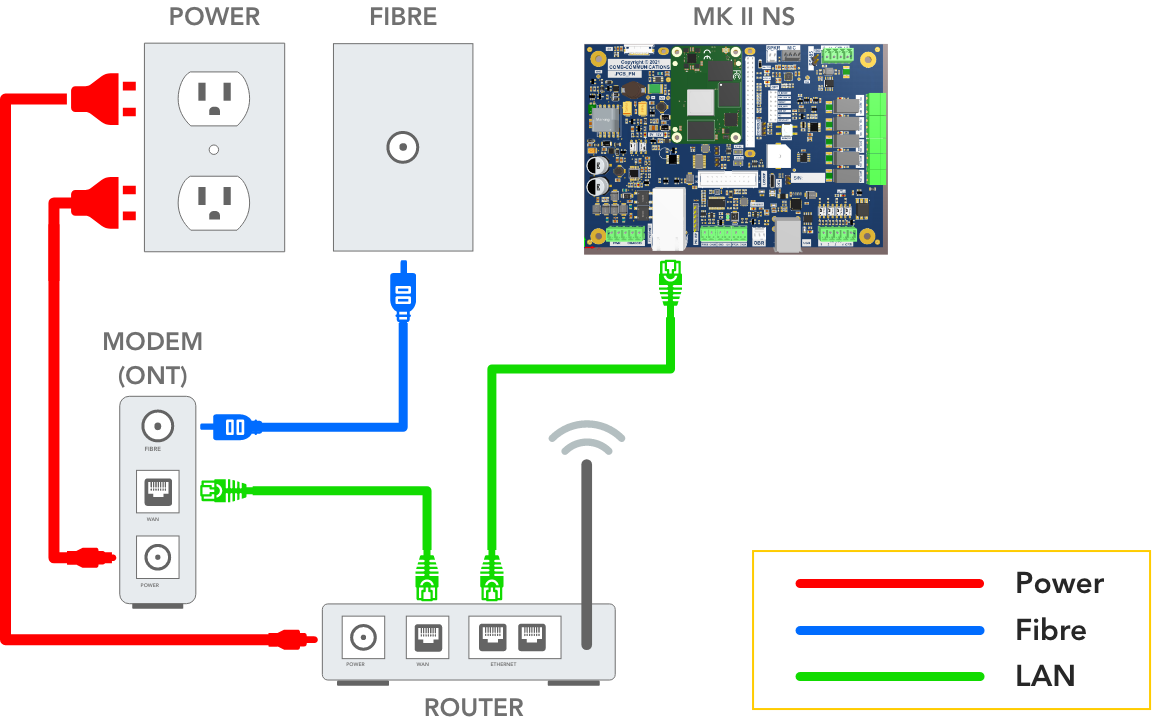
6. The diagram below indicates how to set up your internet connection from your router to the MK II NS PC board.
7. Old triggers and configurations can be copied to the new MK II NS via the Comb Portal. Log on to the Comb Portal and complete the steps below:
- 7.1. Log on to the Comb Portal using your Organisation details.
- 7.2. Select the Organisation Tab -> Devices.
- 7.3. Select Quick Actions -> Convert Device.
- 7.4. Select Hardware type as MK II NS.
- 7.5. Enter a Device Name or leave the default name.
- 7.6. Enter the serial number of the MK II NS. The serial number can be found on the PCB or on the shipping box.
- 7.7. Click the “Convert Device” button.
- 7.8. All triggers and device settings will be copied to the new device.
- 7.9. All triggers, unit data, and configurations will be downloaded to the new intercom.
- 7.10. Select the “Dashboard” tab. The new MK II NS will be displayed.
Congratulations, you have completed upgrading your MK II NS intercom!
Troubleshooting 2g-3g comms banner
If you have upgraded your MK II intercom and are still receiving the 2g-3g network cut-off banner as indicated in the image below [1]. Ensure you have unlinked all your MK II BB intercoms. [2] To do so, navigate to the “Devices” page as indicated below.
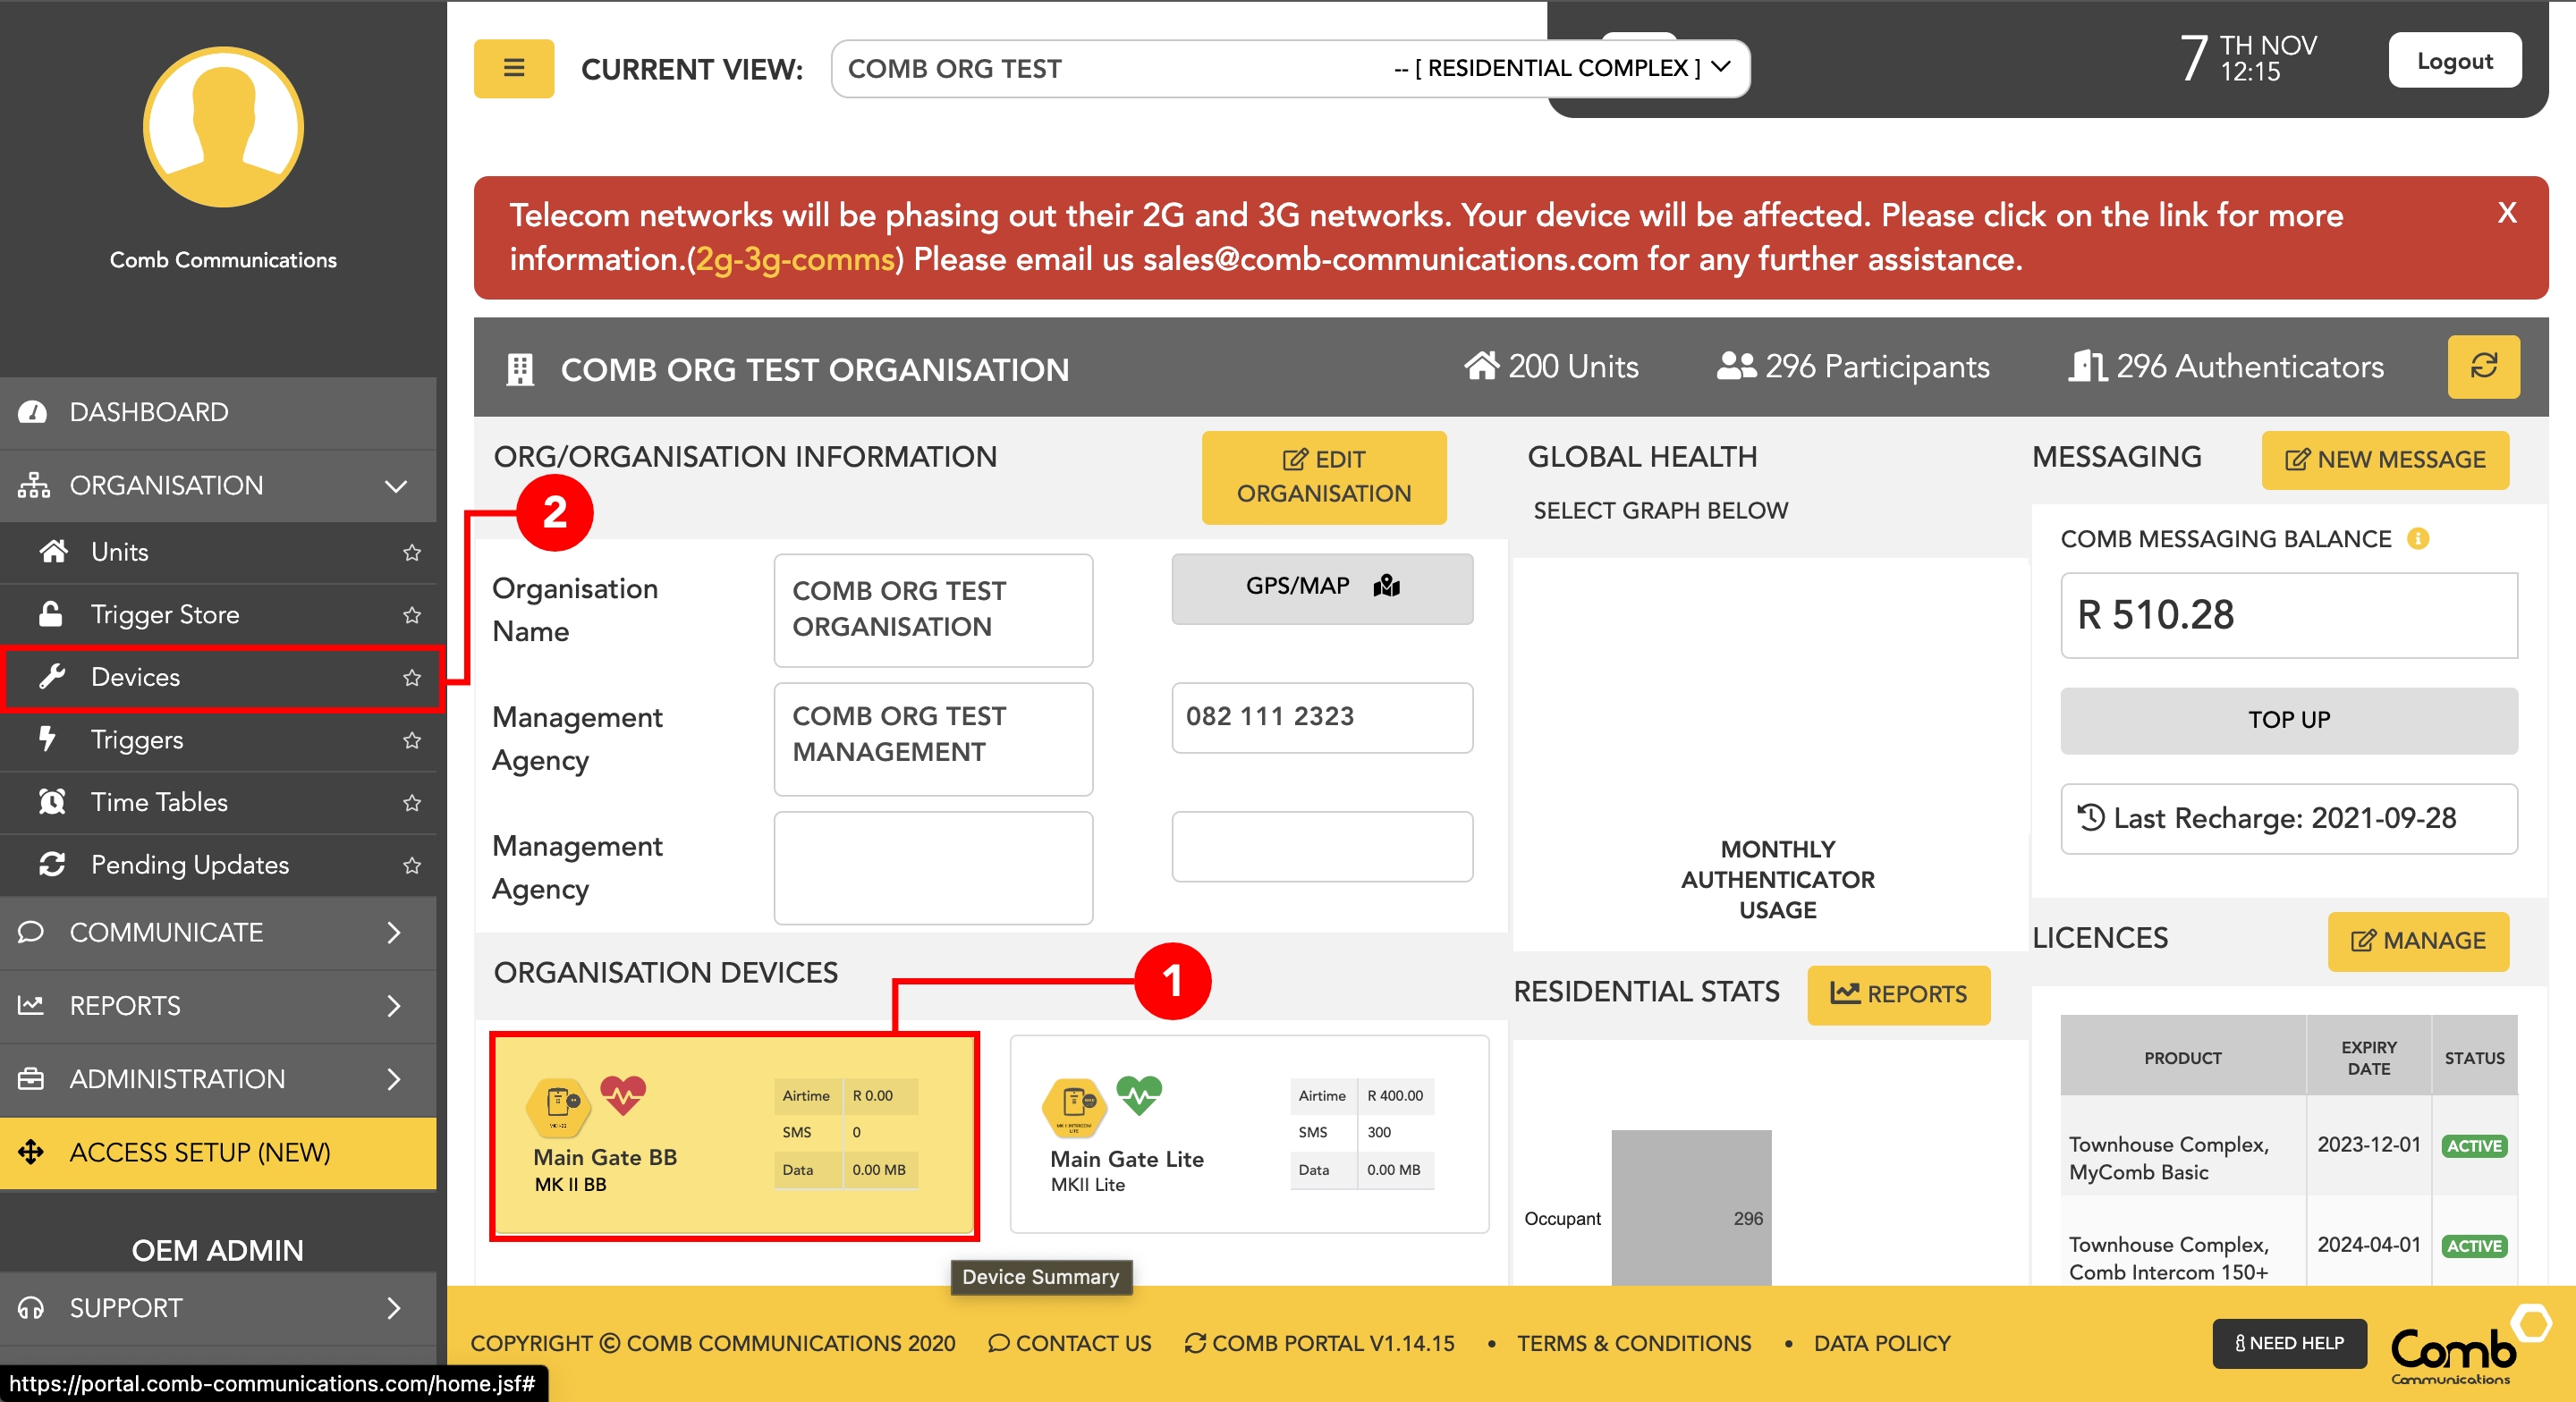
[3] Find the MK II BB intercoms, and click “Quick actions” followed by “Unlink” as indicated in the image below.
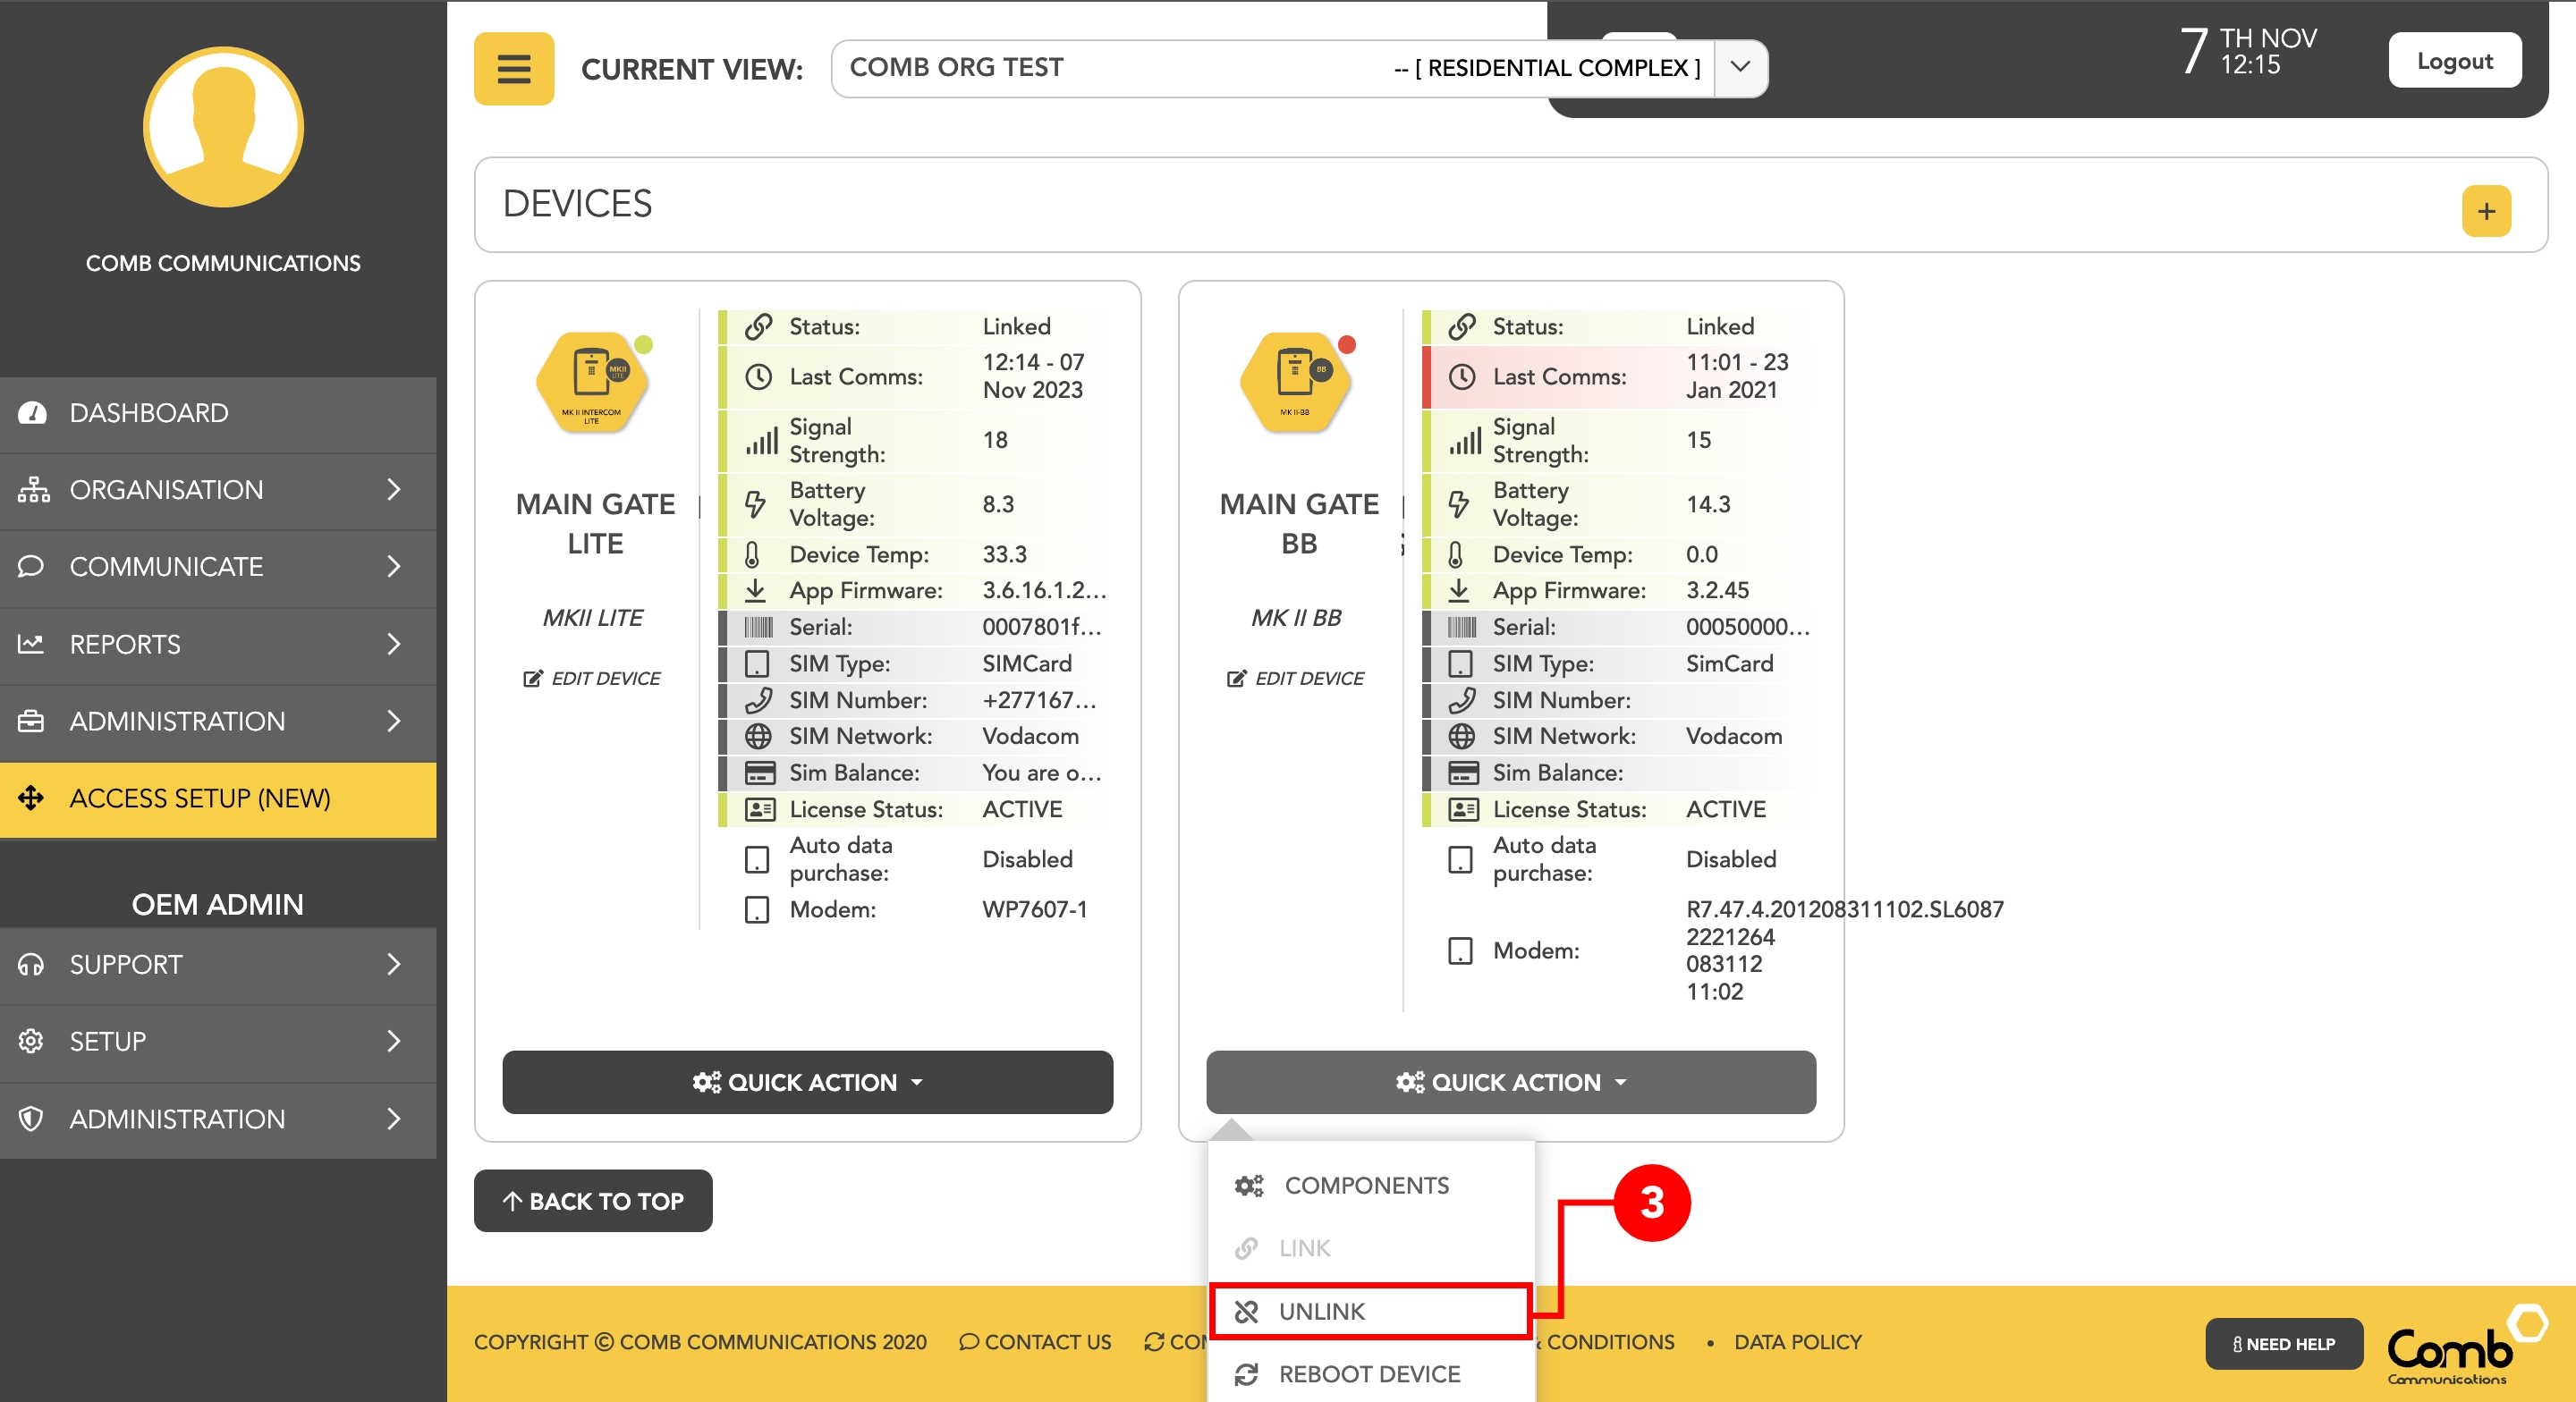
The MK II BB should be unlinked and the 2g-3g comms banner should now disappear.
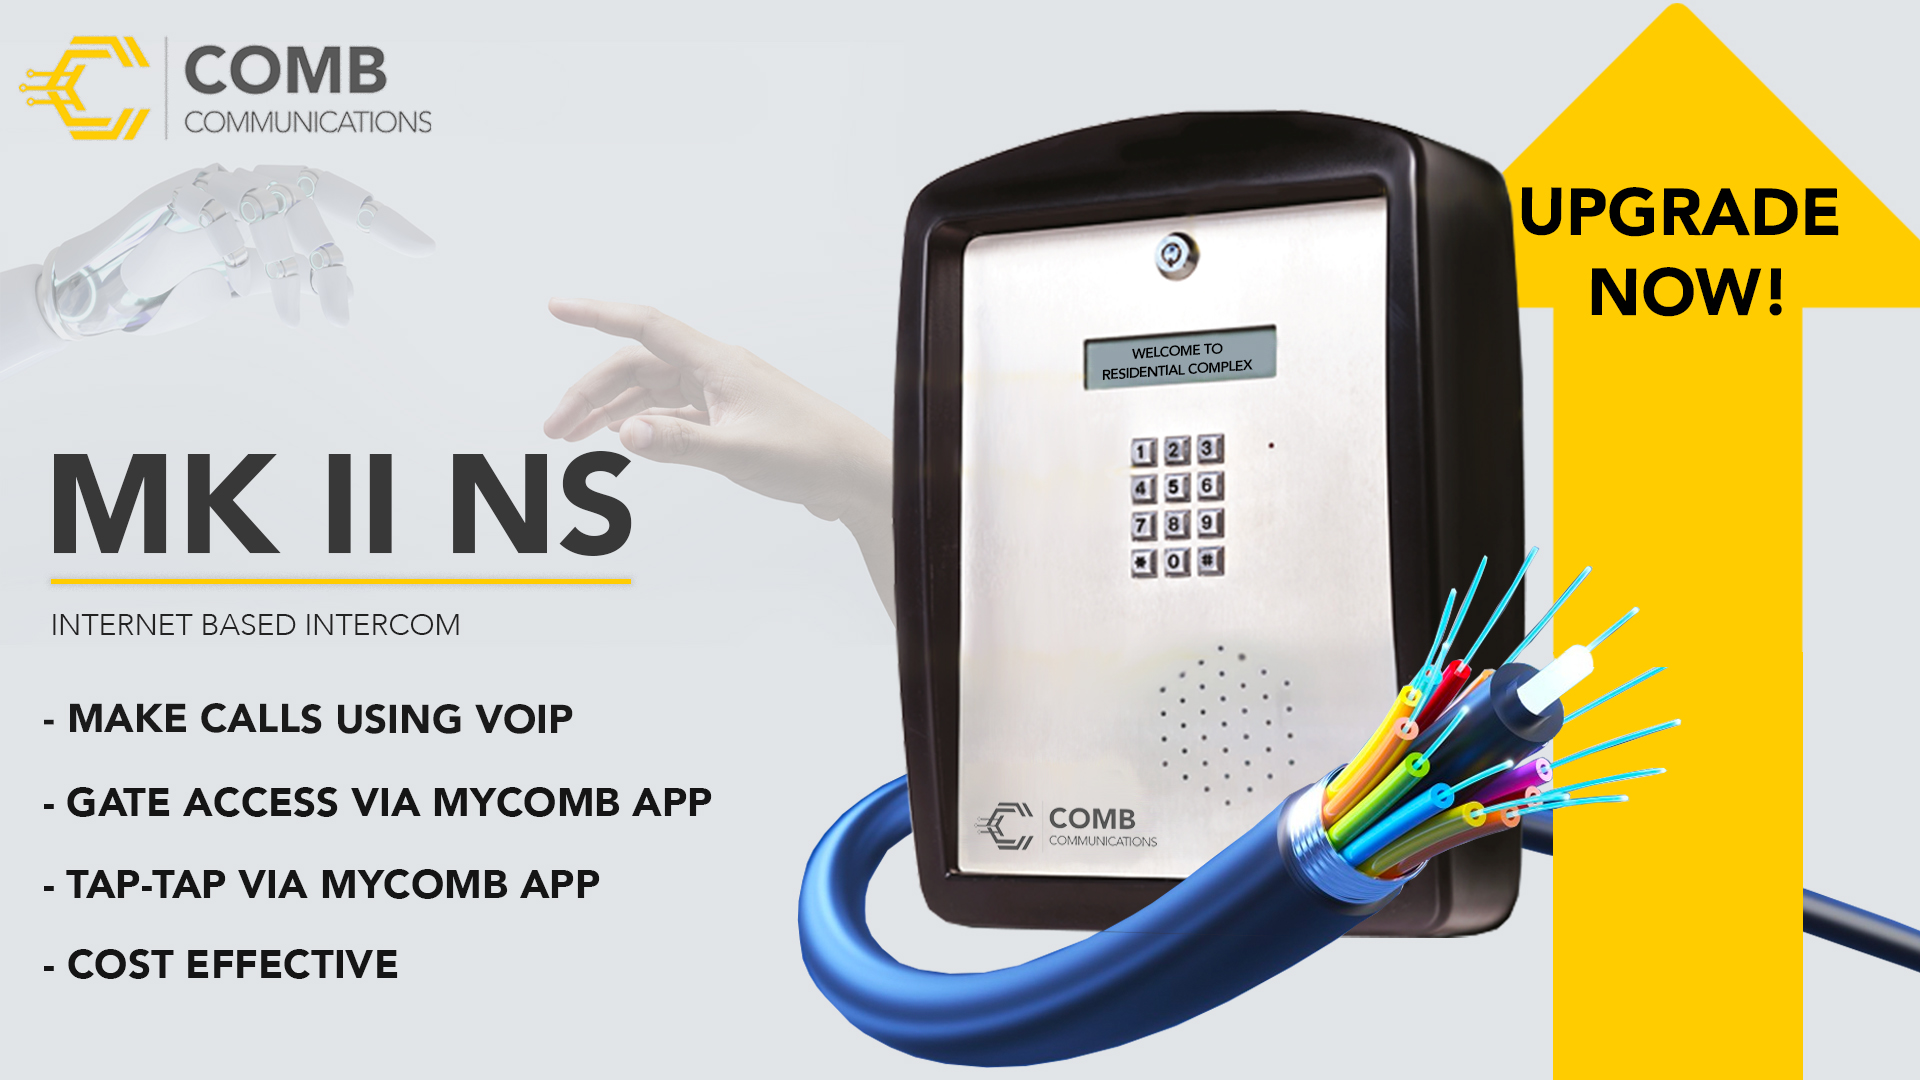
UPGRADE NOW!
Complete the form below and we’ll get in contact with you.

Find an Installer
Our approved installers are trained and accredited to ensure success with every installation.

Find a Distributor
A Network of Trusted Distributors, Empowering Distribution of Combware Excellence.

Need Advice
If you can’t find a solution online, reach out to one of our consultants for professional advice.


